
The event industry has grown significantly in recent years, with more businesses and organizations holding events than ever before. But with this growth comes an increase in the burden of cleaning and preparing for these events, which can be a challenging task. To help alleviate this burden, a comprehensive Event Cleaning Checklist organized by Sydney Local Cleaners can be used to ensure that all areas of the event space are properly and thoroughly cleaned.
The purpose of the Venue Cleaning Checklist is to provide detailed instructions on how to clean the event area and how to properly dispose of any waste materials. It also outlines the necessary items that must be included in the cleaning process, such as cleaning supplies, garbage bags, and protective gear. Additionally, it provides guidance on how to ensure that the event area is safe and hygienic for all participants.
With this checklist in hand, event organizers no longer have to worry about the task of ensuring the space is properly cleaned and ready for the event.
Create a Detailed Venue Cleaning Checklist
Identifying areas that need to be cleaned is the first step to creating a detailed checklist. Visual inspection of the area should reveal any dirt, dust, stains, or debris that needs to be addressed. Once identified, all necessary tasks should be outlined and assigned to a team member to ensure a thorough cleaning. Estimating the amount of time needed to complete the tasks is critical for creating a budget.
The total cleaning time should be multiplied by the hourly rate of the assigned team member to create an estimated budget. Finally, after all, the areas to be cleaned are assigned, the budget can be used to create a detailed checklist.
-
Identify Areas to Clean
It’s time to clean! But where do you start? That’s a great question. To create a successful cleaning plan, it’s important to first identify the areas that need to be cleaned. This is a crucial step; without it, you won’t be able to allocate resources, assign tasks, and create a budget.
Begin by walking through your entire home or office. Take note of any dirt, dust, and debris that you see. Don’t be afraid to open cabinets and closets; you never know what you’ll find! Additionally, be mindful of any areas that are especially prone to dirt and grime. For example, the kitchen countertop may need to be cleaned more frequently than other areas.
Once you have identified the areas that need to be cleaned, take note of the type of cleaning that may be required. Will you need to use a mop, vacuum, or cloth? Are there any special cleaning solutions to use? Are there any areas that need to be hand-washed? Answering these questions will help you create a comprehensive list of cleaning tasks and supplies.
Finally, take a few moments to assess any potential obstacles. Are there any areas that may be difficult to reach?
-
Outline All Necessary Tasks
Having identified the areas that need to be cleaned, it is now time to outline all the necessary tasks. This is the most important step in the planning process as it helps to ensure no task is overlooked and everything is done in the most efficient manner.
The first step is to break down the different tasks into smaller, more manageable chunks. For example, if a room needs to be cleaned, it should be divided into sections such as the walls, ceiling, windows, floors, and furniture. This allows the cleaner to focus on each task one at a time and ensures no part of the room is overlooked.
The next step is to identify the tools and materials that are needed to complete each task. This could include mops, buckets, brooms, vacuums, window cleaners, rags, and sponges. Consider the type of surface that needs to be cleaned and the best products to use to get the best results. Make sure to also include any protective gear that is needed, such as masks, gloves, and eye protection.
Once all of the necessary tasks and materials are identified, the cleaner can start to create a timeline. Estimate how long each task will take and when the overall cleaning project should be completed.
-
Estimate Cleaning Time
Having identified the areas that need to be cleaned, and outlined all the necessary tasks to complete the job, it is time to estimate the cleaning time. This can be done by taking a close look at the size of the area, what needs to be done, and the resources available. It is important to be realistic when it comes to estimating the time, as it will be used to create a budget.
When estimating the cleaning time, it is important to take into account all the tasks that need to be completed. This includes taking out the trash, wiping down surfaces, vacuuming and mopping, and any other kind of task that needs to be done. Taking into account the resources available is also important, such as the number of people working, the amount of time they can work, and the type of tools they have.
It is also important to consider the layout of the area and how much time it will take to go from one place to another. Knowing the size of the area and how many people will be working is also essential. By taking all of these things into account, it is possible to have a realistic estimate of the cleaning time.
Finally, it is also important to keep in mind the size of the task.
Assign Cleaning Duties
Designating specific areas for each person is the first step in assigning cleaning duties. This can be done by creating bold areas for each volunteer. They are then responsible for their designated area, meaning they must keep it clean and free from any hazards. Once this is done, volunteers can be assigned specific tasks and a schedule can be created to ensure that all areas are regularly cleaned.
As tasks are completed, the progress should be documented to ensure that everything is running smoothly. This helps to identify any potential problems and allows for a better overall cleaning experience.
-
Designate Areas for Each Person
Now that you have created a detailed checklist of tasks, it is time to designate areas for each person to clean. This will help create a plan of action for volunteers and make sure that every inch of the space is being cared for.
Mapping the Space is the first step in designating areas for each person. Utilize a map to mark off the space. This will provide a good visual of the size and shape of the area that needs to be cleaned. Once the map is created, mark off the different areas that will need to be cleaned by each individual. This is a great way to divide and conquer the task and make it easier to manage.
Determine the accessibility of the area before assigning any tasks. Make sure that all volunteers are capable of completing the tasks assigned to them. For example, if someone is not able to reach high places, assign them a task that is within their reach. This will make it easier for everyone to complete the task without any issues.
Once the areas have been designated, create a detailed list of the tasks that need to be done. This will help volunteers understand what needs to be done in each area and provide a clear picture of the task.
-
Assign Responsibilities to Volunteers
So, now that the areas have been designated, it’s time to assign cleaning tasks to volunteers. Assigning responsibilities to volunteers is an important step that should not be overlooked. Not only does it ensure that tasks are completed in a timely manner, but it also helps to build team morale and foster an environment of cooperation.
Start by Identifying the Skills and Availability of Everyone Involved
Italicize the skills and availability of everyone involved. This will help you match tasks to the right person. When assigning tasks, make sure to consider each person’s skill level, physical abilities, and availability. You may even consider leveraging technology to coordinate tasks. This will ensure that volunteers are properly matched to tasks that they are capable of completing.
Set Clear Expectations
It’s important to set clear expectations when assigning tasks to volunteers. Be sure to provide a detailed description of the task so that volunteers know exactly what they are responsible for. This will help them stay organized and efficient. Additionally, it’s important to set deadlines for tasks so that everyone is aware of when they need to be completed.
Provide an Incentive
Providing an incentive for volunteers is a great way to encourage them to complete tasks on time and with quality.
-
Schedule Cleaning Tasks
Having an organized plan for cleaning is essential for a successful operation. Scheduling cleaning tasks allows everyone to be aware of what tasks need to be completed and when. It also helps keep volunteers motivated and on track.
Creating a schedule for cleaning tasks should start with a list of all the tasks that need to be done. This list should include daily, weekly, and monthly tasks. Once the list is compiled, assign each task to a specific volunteer or area and create a timeline for when each task should be completed.
To ensure that all tasks are completed on time, it is important to set reminders for each one. This can be done with email reminders, a shared calendar, or a project management system.
It is also important to rotate tasks between volunteers to keep things fresh and to make sure that everyone is contributing. This can be done by assigning volunteers different tasks each month or assigning different tasks to each area on a rotating basis.
It is also important to document progress. This can be done with a written log or a spreadsheet. This will allow everyone to see how far they have come and what tasks still need to be completed.

Prepare Cleaning Supplies
Prepare Cleaning Supplies requires stocking up on cleaning products to ensure an adequate and reliable supply of necessary items. Cleaning supplies should be stored in a safe and accessible place to ensure quick access. Additionally, proper cleaning equipment should be provided to ensure that tasks are completed quickly and efficiently.
This can include items such as mops, dustpans, brooms, and buckets. Furthermore, it is necessary to allocate enough cleaning supplies to ensure a consistent and efficient cleaning process. This can include items such as paper towels, sponges, and cleaning cloths.
-
Stock up on Cleaning Products
Having assigned duties for the team, the next step is to stock up on the necessary cleaning products. This is crucial for ensuring that the job is done to the highest standards and that all areas of the house, office, or other space being cleaned are cared for properly.
When stocking up on cleaning products, it’s important to remember that not all cleaning products are suitable for all surfaces. For instance, some products may be too abrasive for wooden surfaces and can cause damage instead of cleaning. Therefore, it’s important to research the various materials used in the space and find the right cleaning products for each surface.
In addition, it’s also important to know the strength of the cleaning products. Certain products, such as oven cleaners, require very strong chemicals to be effective. However, using these in other areas of the house, such as bathrooms, where the surfaces are more delicate, could cause damage. This is why it is important to use the right strength of the product for each area.
When shopping for cleaning products, it’s important to ensure that the products are from a reputable brand. This means that they should not only be effective but also safe.
-
Provide Cleaning Equipment
Once you’ve ensured that there are enough cleaning supplies to go around, it’s time to gather the necessary equipment for the job. Brooms, mop buckets, and dustpans should all be standard components of a well-stocked cleaning closet. A mop and cleaning cloths are essential for making sure that floors are spotless and looking their best. And a vacuum cleaner is an invaluable tool for keeping carpets looking flawless and free from dirt and debris.
For those hard-to-reach places like corners and ceiling fan blades, extending dusters and microfiber cloths can make the job much easier and more efficient. You’ll also want to make sure that you have an all-purpose cleaner, glass cleaner, disinfectant, and stain remover on hand. Depending on the type of surfaces you’re cleaning, disposable cleaning wipes may be necessary too.
For larger areas, you may want to invest in a floor buffer or steam cleaner, as these can make quick work of even the most stubborn messes.
-
Allocate Enough Cleaning Supplies
After everyone has been assigned cleaning duties, it’s critical to make sure there are enough supplies to go around. Allocate Enough Cleaning Supplies to ensure that each team has enough to complete their tasks. To do this, start by understanding the amount of supplies needed for each task.
To ensure that you don’t run out of cleaning supplies, it’s important to stock up. This could include purchasing items such as cleaning cloths, detergents, and other cleaning products. Additionally, it’s important to plan for future needs, such as extra vacuum cleaners for large-scale cleaning.
Make sure to purchase the right type of cleaning supplies for each task. Different types of cleaning supplies will be needed for different tasks. For example, a task that requires heavy-duty cleaning will need a specific type of cleaning cloth. While a task that requires light cleaning may need just a simple piece of cloth.
It’s also important to consider the size of the cleaning supplies. Depending on the size of the space, you may need to purchase different sizes of cleaning supplies. For example, a larger space may require a larger vacuum cleaner than a smaller space.
Finally, it’s important to purchase enough cleaning supplies to last through the entire cleaning process.
Ready to Experience Seamless Event Transportation? Book Your Ride for Event Transportation with My Shuttle today!
Debris Removal
The debris removal process is an important part of keeping the environment clean and healthy. It involves the removal of garbage disposal, recycling, waste management, trash, and desks, among other items. Garbage must be disposed of in a safe and secure manner, ensuring it is properly segregated from recyclable materials and hazardous waste.
Recycling is an effective way of reducing the amount of waste that is sent to landfills. Waste management is a critical component of debris removal, as it ensures that all unwanted materials are disposed of in an environmentally responsible manner.
-
Garbage Disposal
After gathering all the necessary cleaning supplies, the next step is garbage disposal. Garbage disposal means getting rid of trash, waste, and debris. It can be in the form of throwing away, recycling, or composting. All of these methods are important for keeping our environment clean and healthy.
The most efficient way to get rid of debris is to separate it into different containers, such as plastic, paper, cardboard, glass, and metal. This will make it easier for the garbage collectors to sort out the materials, so they can dispose of it properly.
Another efficient way to dispose of garbage is to compost. Composting is a process of breaking down organic matter, such as food scraps and yard waste, into nutrient-rich soil. This soil can then be used to fertilize plants and gardens. This method of disposal is beneficial to the environment because it reduces the amount of waste going to landfills.
It is also important to sort out the trash correctly. Trash should be placed in the appropriate bins, such as a recycle bin for paper and cardboard, a compost bin for food scraps, and a regular trash can for all other non-recyclable materials.
-
Recycling
Now that the cleaning supplies have been prepared, it’s time to move on to the next step: debris removal. After the furniture has been polished and the surfaces have been wiped down, it’s time to turn our attention to recycling. Papers, cans, and bottles all need to be sorted into their respective bins, and anything that is not recyclable must be thrown away.
The recyclables collected in the office must be sorted according to their materials. Paper, cardboard, and aluminum cans are all recyclable and should be placed into their respective containers. Plastic bottles should also be recycled, and their caps should be thrown away. Glass containers should also be separated from the other materials.
Once the materials have been sorted, they can be taken to the appropriate bins for waste management. It is important to properly dispose of recyclables, as they can be reused in new products. This helps to reduce the amount of waste that goes into landfills, and it can also help to save natural resources.
The recyclables should also be collected from the desks and other areas of the office.
-
Waste Management
Now that the cleaning supplies have been gathered and the debris removed, it’s time to move on to waste management. Although it may seem like a daunting task, it’s a crucial part of keeping a workplace clean and organized.
To start, garbage disposal should be taken care of first. This means sorting through all the garbage and discarding items that can’t be recycled or reused. It’s important to keep the garbage bins separate so that anything that can still be recycled doesn’t end up in the trash.
Next, move on to recycling. Depending on the type of workplace, there are many things that can be recycled, such as paper, aluminum cans, glass, plastic, and cardboard. It’s important to encourage everyone to recycle as much as possible, not only for the environment but for the workplace’s budget as well.
Finally, trash needs to be taken care of. This includes sweeping and mopping floors, vacuuming carpets, and wiping down desks and other surfaces. It’s important to make sure that all areas of the workplace are free from dust and dirt.
Waste management is an important part of keeping a workplace clean.
Floor Care
Meticulous floor care is necessary to ensure a gleaming and inviting home. To guarantee a deep clean, vacuuming is the first step. This quickly and efficiently removes dirt and dust from carpets and rugs. Once vacuumed, mopping is the next step.
This process dissolves and scrubs away dirt and grime from hardwood and tile floors. Then, a sweeping motion is used to collect the debris and dirt particles. After sweeping, dusting is the next step. This involves wiping surfaces with a damp cloth to remove dust and debris.
-
Vacuuming
Having removed all debris from the floors, it’s now time to move on to the important task of floor care.
First up? Vacuuming. This is the key starting point for a deep clean, and the most effective way of removing dust and dirt from carpets, rugs, tiles, and hardwood floors.
Vacuuming is easy to do, but it has to be done correctly for it to be effective. Begin at the far corner of the room and work your way in a systematic pattern, overlapping each stroke as you go. Move the vacuum cleaner in a single direction and don’t forget to get into the nooks and crannies.
For carpets, lift the vacuum cleaner head up slightly to make sure that the suction is deep enough to pick up all the dust and dirt. For hardwood floors, make sure the head is flat on the ground and is adjusted to the correct setting.
To make sure that no dust is left behind, use the crevice tool and extension hose to get into all the hard-to-reach places. Pay close attention to carpets, rugs, and furniture, as this is where dust tends to accumulate.
-
Mopping
Having addressed debris removal, let’s shift our focus to floor care, starting with mopping. Mops are essential tools for maintaining a clean and sanitary floor. If used regularly, mopping can help extend the life of floors and prevent the build-up of dirt, dust, and bacteria. In order to achieve the best result, it’s important to use the proper mop for the job. There are many types of mops to choose from, including:
-
Spin mops, which use a centrifugal force to wring out excess water.
-
Flat mops, which are great for tight spaces, and can be used in combination with a bucket for cleaning large surfaces.
-
Microfiber mops, which are ideal for cleaning hardwood floors, as they are designed to pick up dirt and dust without scratching the surface.
Before mopping, it’s important to prepare the surface with the appropriate cleaning solution. This helps to remove dirt and bacteria and can help make the job easier. Once the surface is prepped, it’s time to break out the mop. Start at one corner of the room and work your way in a clockwise or counter-clockwise direction, depending on preference.
-
Sweeping
Picture it: a spotless floor, free of dust and debris. You can almost feel the sheen of the polished surface beneath your feet. This is the result of a thorough sweeping. Sweeping is an essential component of floor care, and it’s one of the most basic of all the steps you can take to keep your floors looking their best.
Sweeping not only helps to remove dirt and debris from your floors, it also helps to loosen and remove embedded dirt and grime. It can also help to prevent scuffing and scratching of the floor surface. By using the proper tools, you can sweep with ease and get your floors looking their best in no time.
The first step in a good sweeping job is to choose the right broom for the job. You’ll want to look for a broom with soft bristles that can reach into tight corners and crevices. Consider the size of the area you’ll be sweeping as well. If you have a large area, you may want to use an electric broom or a vacuum with a brush attachment to help you cover more ground quickly.
Once you have the right equipment, you’ll want to start by dry sweeping. This can be done by using a dry dust mop or a broom.
Dusting
When it comes to dusting, walls should be at the top of the list. Start by wiping them down with a damp cloth to remove any cobwebs and dust buildup. Next, use a feather duster or damp cloth to remove any dust that may have settled on ceilings. Be sure to take your time and cover every corner, nook, and cranny.
Moving on, furniture should be dusted with a microfiber cloth to remove dust and dirt. Be sure to pay attention to any crevices, which may accumulate dust and dirt over time.
-
Walls
When it comes to walls, it’s important to remember that dust can accumulate quickly and can be difficult to remove. So, it’s important to dust walls regularly. To make the task easier, start at the top and work your way down.
You can use a soft, clean cloth or a duster to remove the dust. A good tip is to use a feather duster for areas like crown molding and baseboards. Be sure to clean all the corners and crevices as well. It’s also a good idea to use a vacuum cleaner with an attachment to remove dust from textured walls.
When dusting walls, start in one corner and work your way along the wall. You can use a damp cloth to remove more stubborn dirt and dust, especially if the walls are painted or wallpapered. If the wall is textured, use a vacuum cleaner with an attachment so as not to damage the wall. Also, remember to dust around light fixtures, windows, and doors.
To really make sure your walls are dust-free, sometimes a good wipe-down with a damp cloth can help. This is especially true if you have pets or children in the house.
-
Ceilings
After taking care of the floors, it’s time to move up to the ceilings. Dust bunnies have a way of gathering on the ceilings, so it’s important to give them some attention. A microfiber duster is perfect for getting up to the highest points of the ceiling, and when used in a sweeping motion, can remove even the most stubborn dust.
Moving around the ceiling, the duster should be able to pick up dust and grime from the edges, trim, and corners. If there are cobwebs, a duster with an extendable handle is perfect for getting them down.
When dusting, it’s important to use firm but gentle pressure so that no damage is done to the ceiling. On the other hand, a firm enough pressure should be used so that the dust is removed and not just redistributed. Changes in temperature, such as when the heater or air conditioner turns on, can cause dust to float around, so one should be prepared to dust the ceiling more than once.
In addition to the duster, a vacuum cleaner with an upholstery attachment can also be used to clean the ceiling.
-
Furniture
Having tackled the task of floor care, the next step in a complete housekeeping routine is to turn our attention to dusting. To begin, let’s consider the furniture. From tables to bookshelves and armchairs, the furniture comes in all shapes and sizes. It can be a daunting task to keep all of it free from dust, but the rewards are worth it.
The best way to start is to use a damp cloth or microfiber cloth. This will help to pick up any dust that has settled on the surface of the furniture. You can also add a few drops of furniture polish to the cloth, but make sure not to use too much, as it can cause a build-up of residue.
Once the surface has been cleaned, it’s time to move on to the nooks and crannies. These are the areas that can be easily missed, so it’s important to get them as clean as possible. For these areas, use a soft brush or a vacuum cleaner with a narrow nozzle attachment. Pay particular attention to the joints, as this is where dust is most likely to collect.
Finally, work your way around the furniture with a soft cloth to buff off any residue.
Wiping Surfaces
Wiping Surfaces can be a tedious but necessary chore. Tables, desks, and countertops all need to be given special attention to help prevent the spread of germs and bacteria. Sanitizing and disinfecting can be done using a range of products, such as bleach-based cleaners, or alcohol-based wipes. The best method for wiping surfaces depends on the type of surfaces being cleaned.
For instance, a table with a glossy finish may need to be wiped with a damp cloth, while a wooden desk or countertop may require an oil-based cleaner.
-
Tables
Having given the surfaces a thorough dusting, the next step is to give them a good wipe-down. When it comes to tables, it is important to use a cloth that is clean and soft. A dry cloth can be used for a general wipe-down, while a damp cloth can be used for sanitizing and disinfecting. For tougher stains, a combination of soap and water can help to break them down.
In order to make sure that the table is completely clean, it is important to start at the top and work your way down. This helps to ensure that any dust or dirt that is dislodged from the higher surfaces can be quickly wiped up before it has a chance to settle on the lower surfaces. When wiping down the table surface, it is best to move in a circular motion.
This helps to ensure that the dirt is properly removed and there are no streaks on the surface. After the table has been thoroughly wiped down, it is then important to dry it off. This helps to prevent any water marks from forming and also helps to preserve the finish of the table.
Once the table has been properly wiped down, it is important to make sure that it has been properly sanitized and disinfected.
-
Desks
Having taken care of the dust, it’s time to move on to the next task: wiping surfaces. Desks, in particular, are a common workspace feature and should be wiped down regularly. But what is the best way to do this? To start, gather all of the necessary cleaning supplies: a cleaning cloth, an all-purpose cleaner, and a glass cleaner.
Begin by spraying the all-purpose cleaner onto the desk and using the cleaning cloth to wipe away any dirt and grime. Move in a circular motion, working your way around the entire desk. Once the desk is clean, use a glass cleaner to make sure all surfaces are streak-free. Glass cleaner also works well for any plastic surfaces on the desk, such as a keyboard or mouse.
When wiping down a desk, it’s important to take the time to get into all of the hard-to-reach spots. This includes underneath the desk, the back of the desk, and the sides. As with any other surface, use a cleaning cloth or paper towel to wipe down all of these spots. Be sure to clean the drawers and any other storage compartments, as well.
-
Countertops
After properly dusting the surfaces, it’s time to move on to countertops, which can easily become a breeding ground for bacteria and germs. Knowing how to properly clean countertops is essential to any cleaning routine.
To start, one should use a damp cloth or a microfiber cloth to wipe the countertop surface. This will help to remove any dust or debris that has been left behind. If the countertop is particularly dirty, then a more abrasive cleaning product can be used. However, it is important to make sure that the product is specifically designed for use on countertops, as some cleaners can cause damage to the surface.
When wiping down the countertop, it is also important to pay attention to any small crevices or corners that may have been left. These places can sometimes be difficult to reach but are prime locations for dirt and grime to accumulate.
Once the countertop has been wiped down, it is important to sanitize the surface to kill any lingering bacteria. This can be done with a variety of products such as disinfectant wipes, spray, or a cloth soaked in a sanitizing solution.
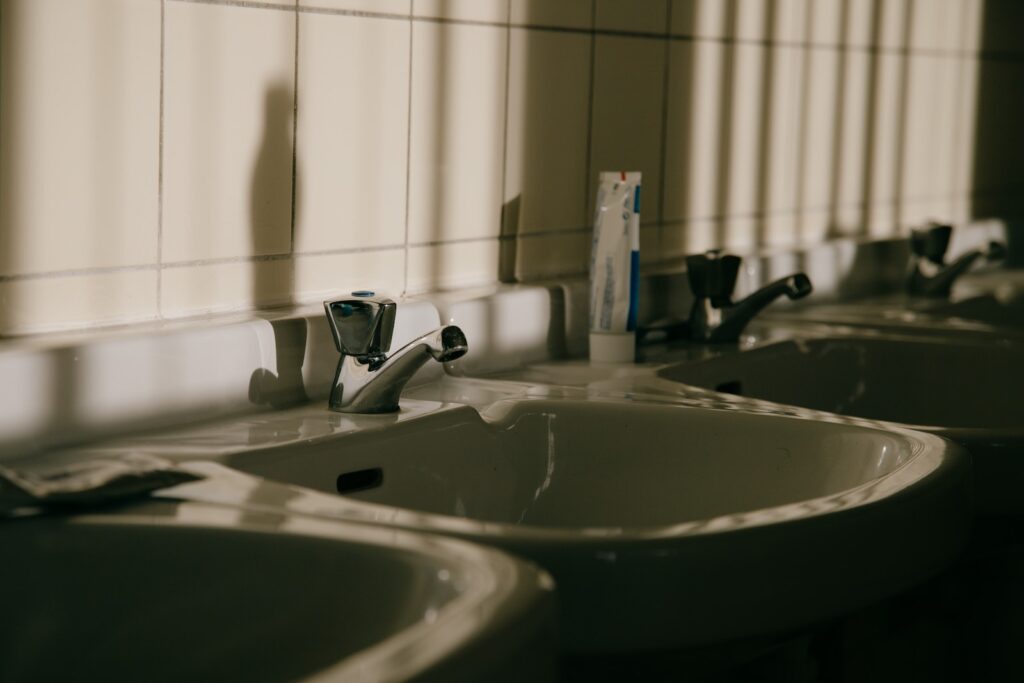
Restroom Cleaning
Restroom Cleaning is an essential task for any facility. Sanitizing fixtures, disinfecting toilets, replenishing supplies, floor cleaning, and paper towel refilling are all important steps in the process. Gleaming surfaces and fixtures offer visitors a sense of comfort and cleanliness. Wiping down counters, sinks, and mirrors with the right cleaning solution eliminates dirt and grime.
Toilets must be scrubbed and disinfected to prevent the spread of germs. Keeping an adequate supply of paper towels, toilet paper, and liquid soap helps maintain a pleasant environment.
-
Sanitizing Fixtures
From a quick wipe-down of surfaces to a more comprehensive restroom cleaning process, it’s essential to take all necessary steps to ensure the cleanliness of your restroom. One of the key steps in achieving a sparkling restroom is sanitizing fixtures.
Sanitizing fixtures is essential in restroom cleaning because it helps to reduce the spread of germs and bacteria. This includes the sinks, faucets, and any other fixture that requires frequent contact with users. To sanitize fixtures, you’ll need to use a disinfectant cleaner that is specifically designed for use in bathrooms.
Carefully apply the cleaner to any fixtures that require sanitizing and then allow the cleaner to sit for a few minutes before wiping it off. You should also use a soft cloth or sponge to avoid scratching the surface of the fixture.
To ensure that all fixtures are completely sanitized, it’s important to pay attention to the details. Make sure to clean any hard-to-reach areas, such as behind the sink, and get into any nooks and crannies. This will help to reduce the spread of germs and bacteria that can cause illnesses.
-
Disinfecting Toilets
And now, we move on to a different, yet vitally important, aspect of restroom cleaning: disinfecting toilets. Disinfecting toilets is a necessary step to ensure that restrooms are free from bacteria and other microorganisms which can spread illnesses. Great care should be taken when disinfecting toilets as the chemicals used may be hazardous to human health.
First, the toilet must be thoroughly cleaned with a brush and cleaning solution. It is important to remove any large debris such as toilet paper, food particles, and other solids. Once the surface of the toilet is clear, the disinfectant should be applied using a spray bottle. Strong-smelling disinfectants are usually the most effective. The disinfectant should be allowed to sit on the surface for a few minutes to ensure it has enough time to kill any bacteria present.
The next step is to scrub the inside of the toilet with a brush to remove any bacteria that may be living inside. It is important to pay special attention to any hard-to-reach areas such as the rim of the toilet. Once the scrubbing is completed, the toilet should be wiped down with a clean cloth or paper towel. This will remove any remaining disinfectant.
-
Replenishing Supplies
Replenishing supplies is an important part of restroom cleaning. Of utmost importance is to ensure that all restroom supplies are stocked, in order to maintain an orderly and presentable restroom. This includes items such as soaps, hand sanitizers, paper towels, toilet paper, and paper cups, as well as any specialized items such as deodorizers or air fresheners.
It is important to check and restock supplies on a regular basis. For those items that are frequently used, such as hand soap, it is important to check the supply level daily and restock when necessary. For less frequently used items, such as toilet paper and paper cups, it is important to check the supply level at least once a week and restock when necessary.
When restocking supplies, it is important to follow the instructions on the packaging. For example, when restocking hand soap, it is important to use the correct amount in order to ensure that the soap does not become diluted. Additionally, it is important to ensure that the soap dispensers are functioning correctly.
In addition to restocking supplies, it is important to check the condition of the supplies.
Window Cleaning
Window cleaning is an essential chore to maintain a home’s pristine look. Wiping glass surfaces is the first step in this process. Utilizing the appropriate cleaning material such as a microfiber cloth, dirt, dust, and smudges can be quickly eliminated. Cleaning window frames can be done with a soft brush, ensuring all dirt is collected in the bristles.
To remove stains, gentle scrubbing with a mixture of dish soap and warm water should do the trick. Removing fingerprints requires a special solution or glass cleaner, as it is a stubborn stain.
-
Wiping Glass Surfaces
Having done the restroom cleaning, it is now time to move on to windows and glass surfaces. After all, a sparkling clean window or glass surface adds a whole lot of class to any setting. So, let’s dive into wiping glass surfaces.
Cleaning windows and glass surfaces is an art. And the trick is to start with a clean cloth or paper towel. You don’t want to spread dirt or dust around. Wipe the glass surface in a circular motion, and then use a dry cloth or paper towel to take off the excess moisture.
It is important to be careful with the edges and corners of the glass surface, and make sure to clean those as well. You don’t want any streaks left behind. You can also use a squeegee to wipe the glass surface in an up-and-down motion and remove any water spots that might have been left behind.
For stubborn stains, you can use a window cleaner or a glass cleaner. Just spray the cleaner onto a cloth and wipe the glass surface. You don’t want to spray the cleaner directly onto the glass surface, as it might leave behind streaks.
If you are dealing with fingerprints or smudges, you can use a glass cleaner or a vinegar solution to wipe them away.
-
Cleaning Window Frames
Now that the restroom has been thoroughly cleaned, it’s time to move on to the windows. Windows are often the unsung heroes of a room, both providing natural light and a view of the outside world while also adding a touch of beauty to the area. But they need just as much attention as the rest of the surfaces to keep them looking their best.
Wiping glass surfaces, cleaning window frames, removing stains, removing fingerprints, and polishing glass surfaces are all important components of window cleaning.
Cleaning window frames is an important part of the process, as these are frequently overlooked. To clean window frames, start by removing any dust or debris with a microfiber cloth or vacuum. Bold Text For tougher messes, you can use mild soap and warm water. Italicize Text Once you’ve wiped down the frames, you can use a dry microfiber cloth to wipe away any remaining soap residue.
You may also want to use a specific window cleaner to help clean the frames. When doing so, make sure to follow the directions on the label and use a microfiber cloth to apply the cleaner.
-
Removing Stains
Moving on to the next task of window cleaning, one of the most important steps is to remove stains. Stains are anything from hard water to smudges, to dirt and grime. While many of these things can be wiped off, some of them may require a little bit of extra effort. Here are a few tips on how to effectively remove stains from windows:
The first step is to apply a specialized window cleaning solution to the stained area. This solution should be designed to gently lift the stain from the glass. Allow the solution to sit for a few minutes before wiping it away with a microfiber cloth.
In some cases, gentle scrubbing may be necessary to remove stubborn stains. If this is the case, use a soft brush and a non-abrasive cleaner to gently scrub the area. Be sure to use a circular motion and avoid scrubbing too hard, as this could cause the glass to scratch.
Another effective way to remove stains is to use a razor blade. This is typically only necessary for very thick, stubborn stains. Be sure to use a razor blade specifically designed for use on glass, as the wrong type of blade could damage the glass.
Final Cleanup
The final cleanup involves removing all the trash and sweeping the floors to ensure that all dirt and debris is gone. Then, a check of all areas is done to make sure everything is in order. After this, a sweep over the floors is done to make sure that all dirt is gone and the floors are looking spotless. Lastly, a mop over the floors is done to make sure that all the dirt and dust are gone and the floors are shining.
The final cleanup is now complete.
-
Removing Trash
After the windows have been thoroughly cleaned, it’s time for the final cleanup. Removing trash is the first step, and it’s important to ensure that all areas are free of debris and clutter. Start by looking for any obvious items, such as wrappers, cups, and paper. Then carefully inspect the furniture and other items to make sure nothing has been overlooked. After the trash has been collected, the next step is to sweep the floors.
Use a broom and dustpan to get rid of any dirt and dust that may be lingering. Sweep around walls and corners, as well as in the middle of the room, to make sure no dust has been left behind. Once the sweeping has been completed, it’s time to mop the floors. Use a mop and cleaning solution to remove any lingering dirt and dust particles.
Mop the entire area, including the corners and walls, to ensure that the room is spotless. When the mopping is finished, stand back and take a look at the room. Is it clean and free of debris? If so, the final step of window cleaning is complete!
-
Sweeping Floors
Now that the windows have been cleaned, it’s time to move on to the next step in the window-cleaning process: sweeping the floors. With a gentle sweep of the broom, all the dirt and debris can be collected and discarded. Taking special care to get into the nooks and crannies, it’s important to make sure no dirt is left behind.
Once the floors are swept, it’s time to mop them. Using a gentle cleaning solution, the floors can be wiped clean and made sparkling. Taking care to clean the corners and edges, the floors should be left looking as good as new.
Lastly, it’s important to double-check all the areas to make sure nothing has been overlooked. Vacuuming up any remaining dust and debris, it’s essential to make sure all areas are completely clean. With a final check, a professional window cleaner can ensure that the job is done right.
Sweeping the floors is an important part of the window cleaning process, and can make a huge difference in the overall appearance of the home. With a careful eye and steady hand, the floors can be left gleaming, creating a beautiful and inviting atmosphere.
-
Checking All Areas
Having finished the hard work of window cleaning, it is now time to move on to the essential final cleanup. This step is important to make sure that the space looks and feels brand new. The first task is to remove any trash that has been left behind. This involves inspecting the entire space and making sure that all garbage has been collected and disposed of properly.
Once the trash has been cleared away, it is time to start sweeping the floors. This requires a thorough approach, as the goal is to make sure that nothing is left behind. The broom should be used to sweep away dust, dirt, and other debris until it is all gone.
Now that the floors have been swept, it is important to check all areas of the room. This means looking carefully in the corners, behind furniture, and other hard-to-reach areas. If there is dirt that was missed, it should be quickly swept away and then mopped. This will ensure that the space is pristine and ready to be enjoyed.
Once the checking process is complete, it is time to sweep and mop the floors. This will make them look and feel like brand new. It is important to use a cleaner that is specifically designed for the type of flooring in the room.
“Ready to experience hassle-free transportation for your next event? Book your ride with Airport Shuttle Northern Beaches today and enjoy reliable, comfortable, and affordable travel.”
Frequently Asked Questions (FAQ) about the Event Cleaning Checklist
-
What is an Event Cleaning Checklist?
An Event Cleaning Checklist is a comprehensive list of tasks and responsibilities that need to be completed before, during, and after an event to ensure cleanliness, hygiene, and orderliness. It serves as a guide for event organizers, cleaning staff, or volunteers to maintain a clean and pleasant environment for attendees.
-
Why is an Event Cleaning Checklist important?
An Event Cleaning Checklist is crucial for maintaining a positive and professional image of the event. It ensures that all necessary cleaning tasks are performed efficiently, helping to prevent accidents, promote attendee satisfaction, and comply with health and safety regulations.
-
What should be included in an Event Cleaning Checklist?
An Event Cleaning Checklist typically includes tasks such as venue preparation before the event, regular cleaning during the event, waste management, restroom maintenance, floor cleaning, and post-event cleanup. It should also account for high-traffic areas and any special cleaning requirements specific to the event.
-
Who is responsible for the event cleaning?
The responsibility for event cleaning usually falls on the event organizer or venue management. They may hire professional cleaning services or designate a team of staff or volunteers to handle the cleaning tasks.
-
When should the cleaning checklist be prepared?
The cleaning checklist should be prepared well in advance of the event to allow for proper planning and allocation of resources. It’s advisable to finalize the checklist at least a week before the event date to make any necessary adjustments.
-
Can a standard cleaning checklist be used for all types of events?
While a standard cleaning checklist can serve as a starting point, it’s essential to customize it based on the specific needs and nature of the event. Different events may have varying attendance levels, types of activities, and venues, all of which require adjustments in the cleaning checklist.
-
How can organizers ensure the checklist is followed effectively?
To ensure the checklist is followed effectively, clear communication is key. Organizers should conduct training sessions for cleaning staff or volunteers and ensure they understand their roles and responsibilities. Regular inspections and feedback loops can also help to maintain high cleaning standards throughout the event.
-
What safety precautions should be considered in event cleaning?
Safety is paramount in event cleaning. Cleaning staff should be provided with appropriate personal protective equipment (PPE) and trained in the safe handling of cleaning chemicals. Additionally, they should be aware of emergency procedures and evacuation routes.
-
How can event organizers reduce waste during events?
Event organizers can reduce waste by promoting the use of reusable or recyclable materials, encouraging attendees to bring their own water bottles and utensils, and providing clearly labeled recycling bins throughout the venue.
-
Is it necessary to hire professional cleaning services for events?
While hiring professional cleaning services can ensure a high level of cleanliness, it may not always be necessary for smaller events. Organizers can consider their budget and the scale of the event to determine whether hiring professionals or using trained volunteers is the best approach.
Conclusion
The task of organizing an event can be time-consuming, but having a detailed checklist of the cleaning duties needed will help make the job easier and less stressful. From the preparation of cleaning supplies to debris removal, dusting, wiping of surfaces, and restroom cleaning, the event cleaning checklist should include all necessary tasks to make sure the job is done correctly. A final cleanup should also be done to ensure the area is spotless and presentable. Having a checklist and assigning tasks will help ensure that the event is a success.